Pokazywanie postów oznaczonych etykietą Malifaux. Pokaż wszystkie posty

wtorek, 21 stycznia 2014

Nasz pierwszy odlew / Our first cast

Witajcie w drugiej części. Zacznę od punktu siódmego, jako że na szóstym żeśmy zakończon, hehe.

Welcome in part two. I shall start with step seven, as on six finished we have, lols.

7. Jak pamiętacie na tym etapie skończył się poprzedni tutorial. Forma wyglądała tak:

As you remember, we have finished more or less in that state. The mould looked like this:


A po odwróceniu prezentuje się tak:

And after flipping upside down:


Po zdjęciu klocków i ogólnym wygląda tak:

After removing the bricks like this:


8. Teraz gotowi jesteśmy wyjąć ostrożnie oryginały i zobaczyć jak prezentuje się forma:

Now we are ready to remove the originals and inspect the mould:


9. Jak już wszystko się zgadza, łapiemy oryginały i wrzucamy na wagę. Jeśli były, jak w tym przypadku zrobione z żywicy, to sprawdzamy w ten sposób ile żywicy musimy przygotować do pierwszego odlewu.

Assuming everything's A-OK, grab the originals and weigh them. If they were, as in this case, cast in resin, this should give us a guideline on how much resin we need to prepare for our first cast.


10. Mamy już nasze 47g, czyli 24 na każdy składnik (przy żywicy dwuskładnikowej 50/50).

We got our 47 g, so 24g of each compound (in two compound resin 50/50).


W przypadku pierwszego odlewu, proponuję rozrobić trochę więcej i przygotować (jeśli już macie) inną formę, aby tam odlać resztkę. W ten sposób nic się nie zmarnuje, a na pewno wam wystarczy żywicy aby formę ładnie zalać.

If this is the first try with the mould I suggest mixing a bit more and have one other mould ready so you can dispense the remaining resin. This way we do not waste any and have enough to fill the mould properly.

11. Rozrobioną żywicę wlewamy połowicznie lub mniej w formę i stosujemy mój kolejny trik.

Pour the mixed resin half way into the mould and apply my next trick.


Patyczkiem do uszu rozprowadzamy po brzegach i dolnych partiach. W ten sposób unikniemy niedolewek. Jak już to zrobione, zalewamy resztę tak, aby była lekko wypukła, nie może być efektu niepełnej szklanki - wolimy przelaną.

With an ear bud spread the resin all over the bottom and deep creaveces of the mould to fill them with it avoiding any bubbles. Then we pour the rest until we have the effect of an overfilled glass top.


Jak na obrazku powyżej. Jak widzicie, forma na podstawkę dreadnoughta leży obok i zbiera resztki. Z kilku takich akcji mam podstawek, ich nigdy za mało.
Tak zalaną formę zostawiam na kilka godzin. W sumie można już wyjmować po 45 minutach, ale to są duże gabaryty i grube, więc dla bezpieczeństwa zostawiam na dłużej.

As you can see on the picture above, I have a dreadnought base at hand to pour excess resin. Couple of tries and I have a full base. There's never enough of them.
The mould should stay like this for couple hours at least. You can pull out after 45 minutes, but since these are huge in size and volume I should leave it longer.

12. Jak sprawdzić, że już wszystko gotowe? No ja na przykład odłamuję jakąś drobną nadlewkę:

How to check if it's all set? Try the overfilled resin:


Jeśli jest krucha, to można już wyjmować, ale wszystko zależy od żywicy jakiej użyjecie. Musicie to wyczuć po prostu. Jeśli macie wątpliwości, zostawcie na dłużej, proste.

If it cracks easy it should mean it's OK to pull casts out. You need to get the feel of the resin you use. The longer you leave it in, the better.

13. I Voila! Cyk Myk i nasze twory są gotowe!

And Voila! Few steps and it's ready!


Jeśli macie jakieś sugestie lub też pytania odnośnie powyższego tutka, piszcie śmiało w komentarzach.

If you have any questions regarding this tutorial, go ahead and ask in the comments.


niedziela, 19 stycznia 2014

Przygotowanie formy silikonowej / Silicone mould preparation

Witajcie! Po długawej przerwie przygotowałem dla was mały tutorial. Nic wielkiego, ale dla kogoś, kto chciałby zacząć bawić się formami odlewniczymi, zawsze jakiś początek. A więc do rzeczy...

Welcome! After a longer break I bring you a short tutorial. It's something for those of you would like to start playing with resin moulds. Let's go!

1. Najpierw musimy wymyślić sobie układ jaki chcemy zastosować. Najlepiej grupować w jednej formie elementy podobnej głębokości, tudzież wysokości. Ograniczy to marnowanie silikonu i umożliwi stosowanie wkładek z elementów starych form (o tym później). Zerknijcie na obrazek poniżej:

1. First you need to come up with a set up of your mould. Keep items of the same height / depth together, so it is possible to use remains of old mould (later on that) and minimise waste of silicone.

 photo formy_1.jpg

Duże beczki i duże skrzynie są w jednej linii, małe elementy w drugiej. Starajcie się zachować kilka milimetrów odstępu między jednym elementem a drugim, aby ścianki nie były zbyt cienkie. Uchroni nas to przed odkształceniami odlewu i uszkodzeniami formy przy wyjmowaniu. Ja proponuję minimum 3 milimetry przerwy jak już będziecie wiedzieć jak wyjmować, aby nie uszkodzić.

Big barrels and crates are put together, small elements as well. Try to keep few milimeters of space between each item, so the walls keep the shape of the original. I strongly suggest minimum 3 milimeters. This will also keep the mould safe from damaging during removal of casts.

2. Kolejnym krokiem jest ułożenie bariery trzymającej silikon w miejscu. Na tym etapie nie mocuję go jeszcze do podłoża (o tym dlaczego już za chwilę). Upewnijcie się, jak przy rozmieszczaniu elementów, aby było dość miejsca do krawędzi. Zewnętrzna grubość jest w sumie najważniejsza i trzyma waszą formę w formie, że tak się wyrażę...

2. Next step is to build a barrier keeping the silicone in place. I do not fasten it to the base just yet (more on that later). Make sure that the external borders are thick as well. They will keep the whole mould in shape.

 photo formy_2.jpg

Zerknijcie na to z góry:

View from the top:

 photo formy_3.jpg

3. Teraz, kiedy formę mamy już gotową przystępujemy do rozrobienia silikonu. Są dwa sposoby: naukowy i "na oko". Naukowy to wyliczenie ile gram na cm3 silikonu potrzebuje w formie, minus cm3 zajmowane przez nasze oryginały. Ja preferuję ten drugi, wystarczająco form już narobiłem, żeby wiedzieć kiedy mam dość silikonu.
Silikon którego używam wymaga 5-6% aktywatora, więc na 103 gram wlewam kolejne 6.

3. Now when that's done, you need to start mixing the silicone. There are two ways to go about it: scientific and "gut" one. The scientific one is the calculation of how many grams per cm3 of silicone you need for the mould, minus cm3 of items you got in the mould. I prefer the "gut" one, I have done enough moulds to know how much I need.
For this mould I will start with 103 grams of silicone and 6 grams of activator (5-6% of silicone).

 photo formy_4.jpg

Teraz należy dokładnie wymieszać. TEN ETAP JEST BARDZO WAŻNY. Inaczej pokryjecie swoje twory silikonem, nie gotowym na ścięcie. Albo co gorsza, z wierzchu będzie tip-top, a w środku będzie świeży. Mieszajcie dotąd, aż będzie to jednolita masa. Zbierajcie z dołu kubeczka, z brzegów, z boków... wszystko należy wmieszać.

Now you need to mix it thoroughly. THIS STEP IS VERY IMPORTANT. If you do not mix it properly, you might end up with your items being covered with partly mixed silicone, which is not ready to set. Your mould will be useless and would have to be thrown out. While mixing, make sure you scrape the bottom, sides and all parts of your cup.

4. Kiedy już nasza masa jest gotowa pokrywamy zawartość formy. I tu mój mały trik. Ja mianowicie najpierw pędzelkiem "od silikonu" pokrywam wszystkie szczegóły. Mnie idzie to całkiem szybko, ale jeśli nie macie jeszcze do siebie zaufania, to rozróbcie sobie najpierw małą ilość silikonu i dopiero jak już skończycie ten etap, to rozróbcie resztę.

4. When our mix is ready and uniform, you can start covering your mould. And here's my trick. I use "that silicone" brush and cover all details on my originals. This way I am sure they will be present in the final mould. It doesn't take too much time, but if you do not want to rush it or your model is complex, make two batches of silicone, one small one with the rest.

 photo formy_5.jpg

Można ten krok spokojnie pominąć, ale ryzyko jest, że nie wszystkie szczegóły będą widoczne na formie, albo co gorsza powstaną w silikonie bąbelki, które będę nadlewkami na odlewie.

You can easily skip this step, but your risk not have all the details in the final mould. What's worse, you might get bubbles, which will be extra resin on your cast.

5. Teraz zalewam formę resztką rozrobionego silikonu. Jeśli nie pokryję całej to nic się nie stanie, zawsze można dorobić. Gorzej jak mamy silikonu za dużo.

5. Now it's time to cover the mould with the rest of the silicone. If it's not covered fully, no worries. It's better to have less than too much of silicone.

 photo formy_6.jpg

Nie martwcie się tymi bąbelkami. Powstają przy nalewaniu. Im wolniej tym lepiej. Im rzadszy silikon tym lepiej, sam się wypoziomuje, co dam nam równą podstawę przy odlewaniu.

Do not worry with these air bubbles. They appear while pouring the silicone. The runnier the silicone, the more bubbles and better for us. It will self level and prepare a flat base for casting later.

6. Teraz możemy zająć się dorobieniem silikonu i wykorzystaniem starych ścinek niepotrzebnych, zużytych form (tak, formy się zużywają po jakimś czasie).

6. Now you can start adding bits of old moulds. Yes, yes... moulds get used up after some time.

 photo formy_7.jpg

Jak prawdopodobnie widać, w lewym dolnym rogu włożyłem kawałek starej formy.

As you can see in the bottom left corner, I have put a bit of an old mould.

 photo formy_8.jpg

A tu już nie widać, ponieważ ją trochę podtopiłem.

And now you don't, cause I sank it a bit.

Po odczekaniu od 12h do 24h (lubię mieć pewność) w zależności od grubości formy, możemy rozebrać wszystko i bawić się w odlewanie.

After 12 to 24 hours (I like to be sure), depending on mould thickness, we can take out the parts and start casting.

Taka mała notka: tak, użyłem tutaj skrzynek i beczek jakiejś firmy, ale nie miałem nic lepszego pod ręką, co by miało prosty kształt i dało się ogarnąć początkującym. W następnym tutku, pokażę jak otworzyć taką formę i przygotować odlew. Mam z tym parę sztuczek związanych.

Side note: yes, I have used some company's barrels and crates, but they were the simplest shape I had at hand that would be easy for a first cast for beginners. In next tutorial I will show you how to carry on with your first cast, and few tricks I have.

niedziela, 9 czerwca 2013

Stół do skirmishy / Skirmish table

Pod pojęciem "skirmishy" mam oczywiście Malifaux, ale nie wykluczam jakichś innych systemów (Mordheim, Warheim?) czy mniejszych potyczek w systemach, w które już gram (40k, WFB). Ale przede wszystkim Malifaux.

Wraz ze wschodem, że tak powiem, najnowszej wersji, postanowiłem wrócić do mojego drugiego ulubionego systemu i dorobić sobie stół, który niekoniecznie będzie mi zajmował całą jadalnię. Tak więc udałem się na zakupy i po 24 godzinach stół już był gotowy i wysychał.

Poniżej w kilku punktach pokazuję co i jak zrobić.

When I say "skirmish" I mean Malifaux, but I would not say no to other systems (Mordheim, Warheim?) or smaller battles in 40k or WFB. Mainly though, Malifaux.

With the appearance of 2nd edition beta rules I decided to come back to my second favourite game system and get a table that would not take over the whole eating area in my house. So, off to the shops I went and in less than 24 hours the table was done and ready for drying.


Below is what I have done in few steps.


 photo Skirmish_Table_01.jpg

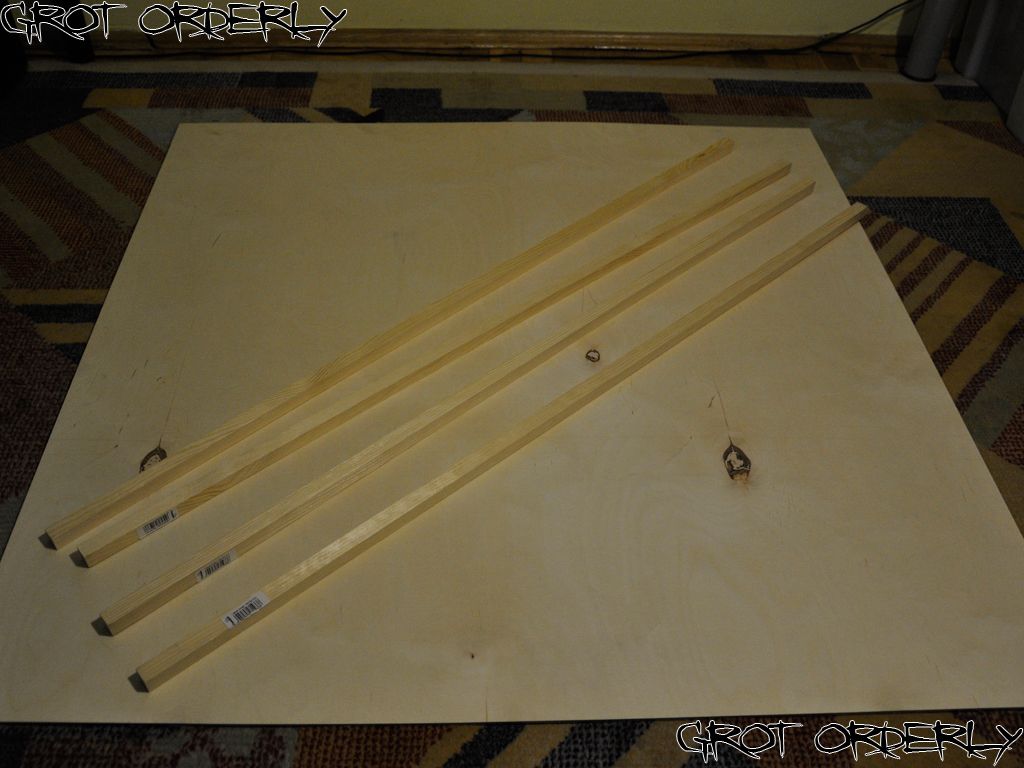
Zakupiłem płytę ze sklejki trzy stopy na trzy. UWAGA! W Leroy Merlin nie wiedzą co to stopy. 91,5x91,5cm. Do tego cztery listewki 15x15x100, butelkla PVA / wikolu, puszka czarnej farby akrylowej matowej / satynowej oraz piasek (ten już miałem).

I have bought a ply wood board of 3"x3" or 91,5x91,5cm if you wish, four 15x15x100 pieces of wood, bottle of PVA, a can of black satin / matt acrylic paint and sand (this I had already).

 photo Skirmish_Table_02.jpg

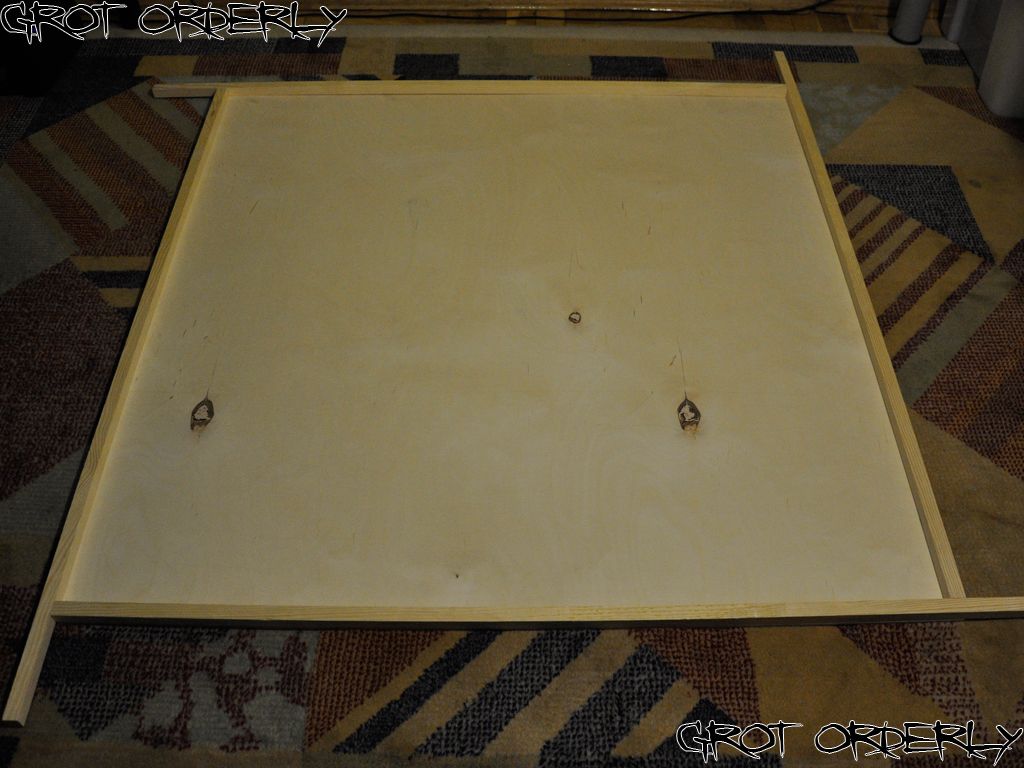
Przymocowałem listewki na brzegach. Wzmocniło to nieco gibką płytę i daje możliwość uchwycenia. Od spodu przykleiłem filcowe podkładki (takie jak do krzeszeł).

I have mounted those pieces of wood to strengthen woobly ply of wood and to have something to hold on to while moving it around. Soft sliders have been attached underneath.


 photo Skirmish_Table_03.jpg

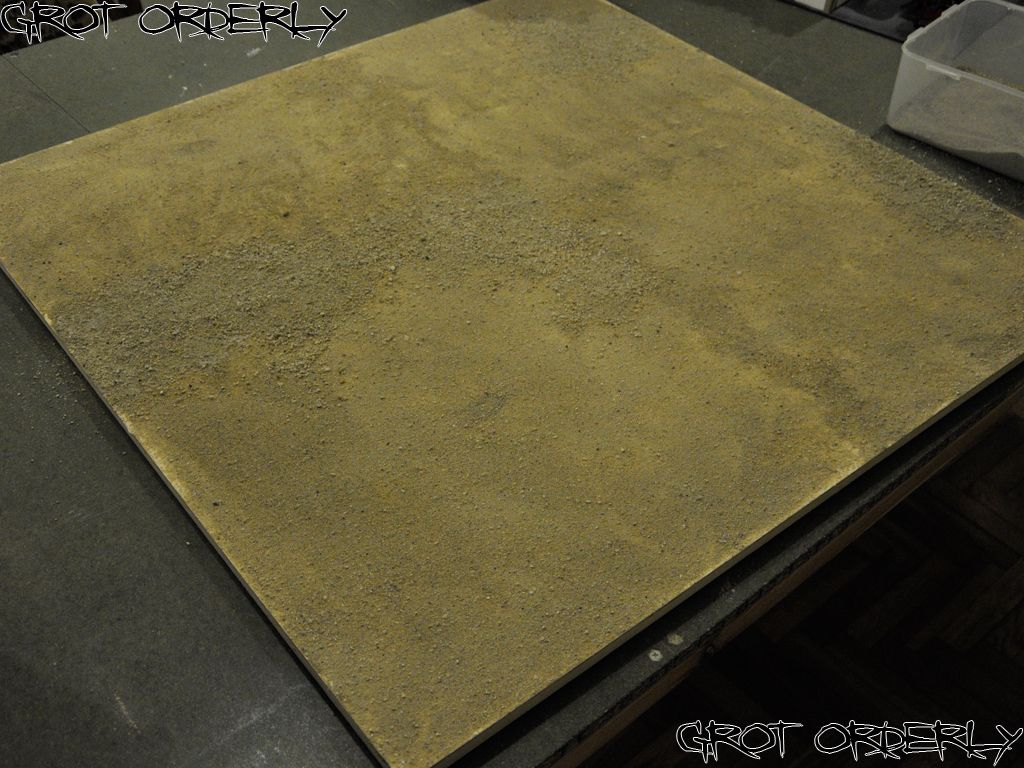
Warstwa wikolu i piasek.

Layer of PVA and sand


 photo Skirmish_Table_04.jpg

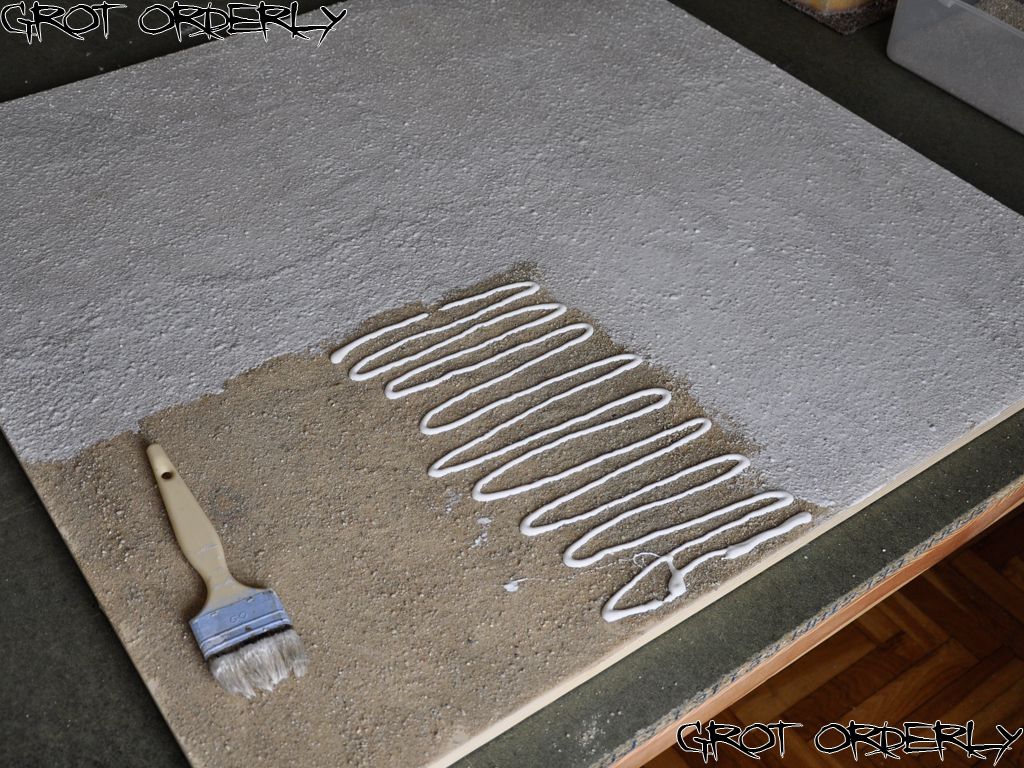
Kolejna warstwa wikolu, tym razem bez piasku, aby wzmocnić mocowanie piasku.

Another layer of PVA, no sand this time, to increase the hold of sand to the board.


 photo Skirmish_Table_05.jpg

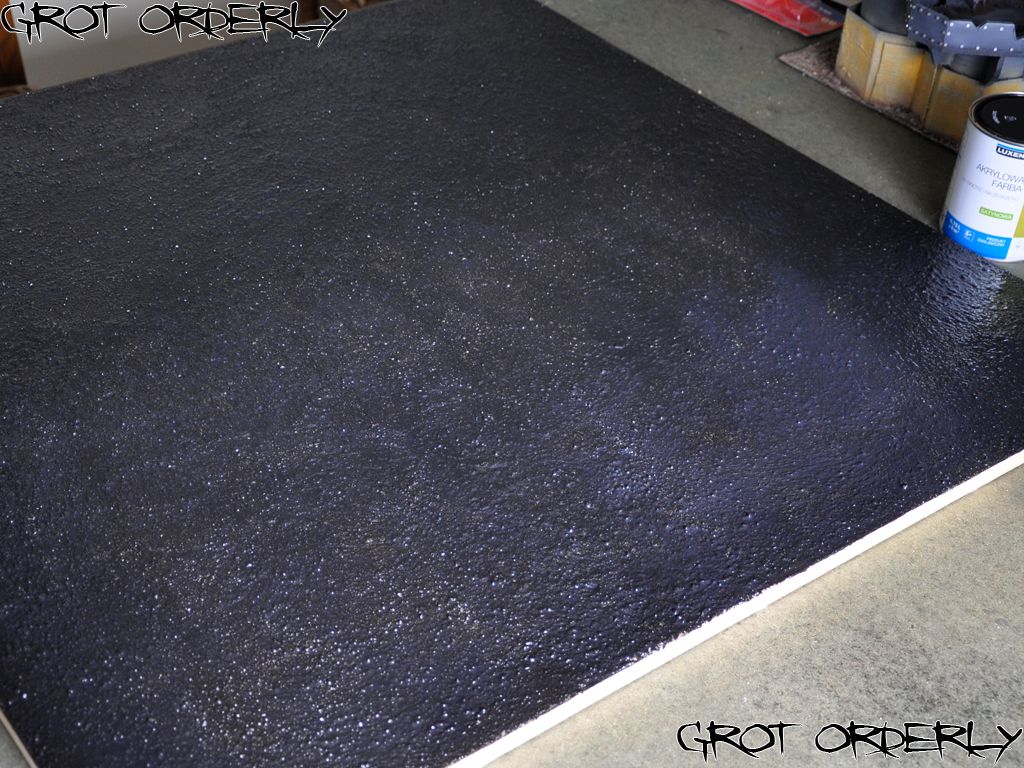
Warstwa czarnej farby. Gruba warstwa, dodatkowo przytrzymuje piasek oraz stanowi podłoże pod malowanie.

A layer of black paint. Thick, to strengthen the grip of sand and prepare the basecoat for further painting.


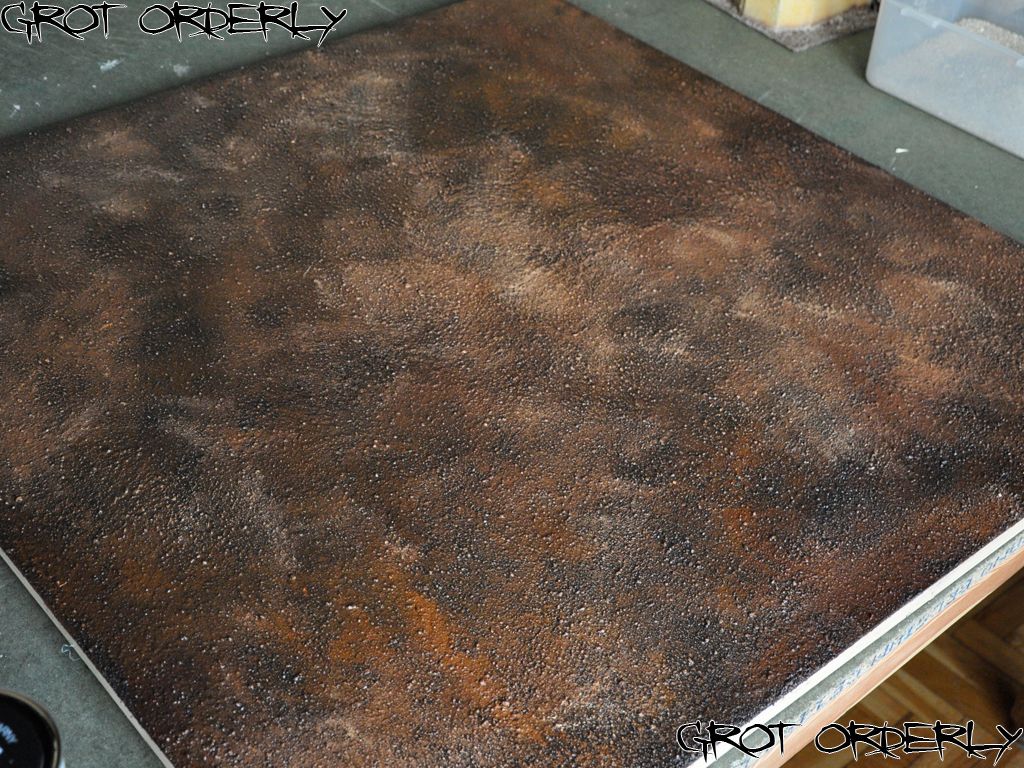
 photo Skirmish_Table_06.jpg

Losowe placki różnych odcieni brązu, troche mieszanek. Ogólnie Scorched Brown (odpowiednik) oraz drybrushe Bestial Brown i Bleached Bone / Bestial Brown (1:1).

Random splats of different shades of browns. Scroched Brown (equivalent) and Bestial Brown and Bleached Bone / Bestial Brown (1:1).


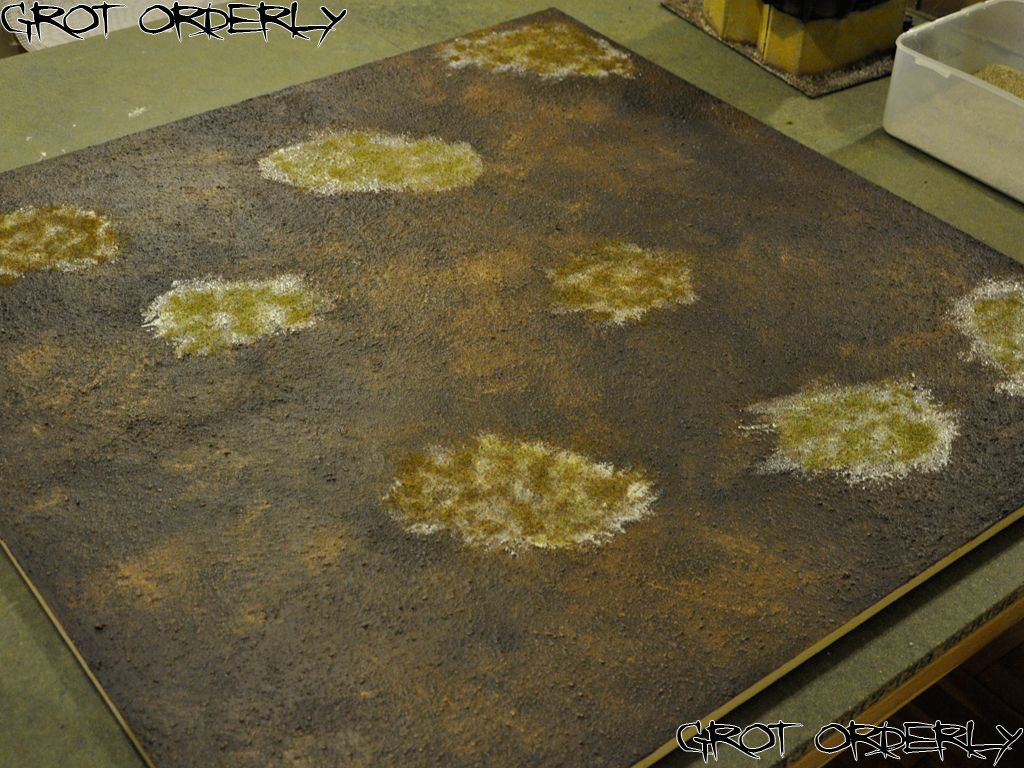
 photo Skirmish_Table_07.jpg

Placki trawy.

Spots of grass.


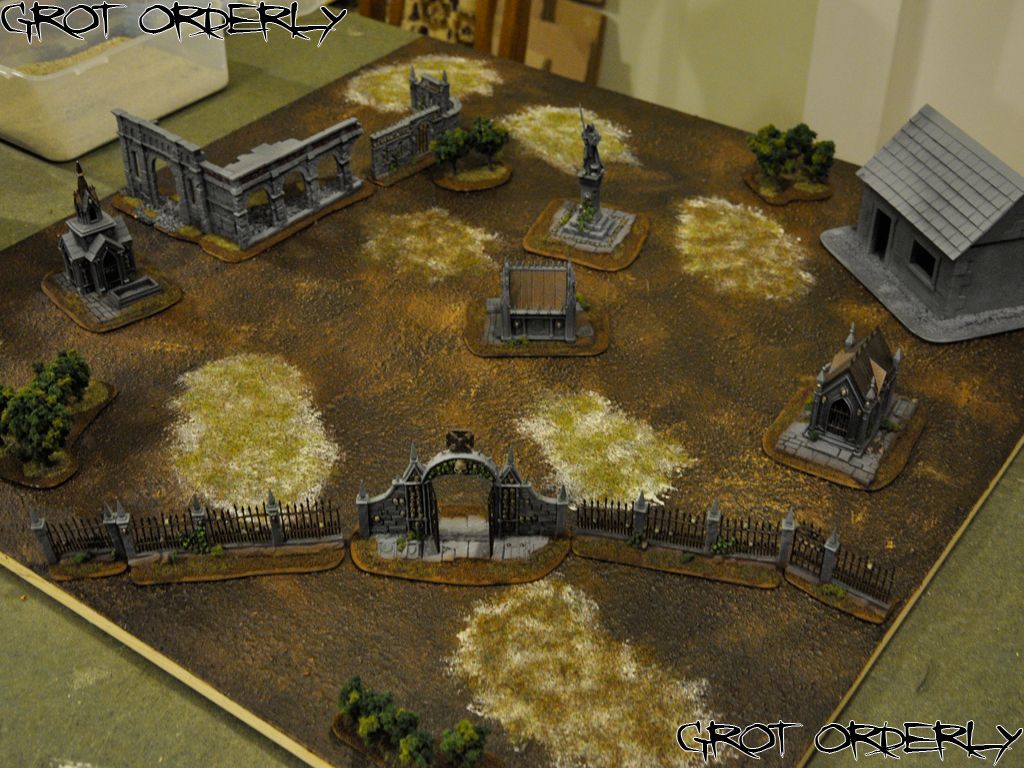
 photo Skirmish_Table_08.jpg

I gotowe! Na szybko ustawiony teren. Domek w rogu będzie malowany następny.

And voila! It's done. Quick setup of terrain. The grey house in the corner will be painted next.

środa, 5 czerwca 2013

Malifaux Beta!

W blogosferze pojawiły się linki do nowej edycji Malifaux, nowych kart itd. Linki zamieszczam poniżej, warto zerknąć. Podobnież są nowe postaci, które jeszcze nie są dostępne!

There are links in blogosphere to the new edition of Malifaux, stat cards and so on. Links below. Apparently there are new characters who are not available yet!

 photo wpid-malifaux-logo.jpg


piątek, 3 lutego 2012

Various projects progress pics

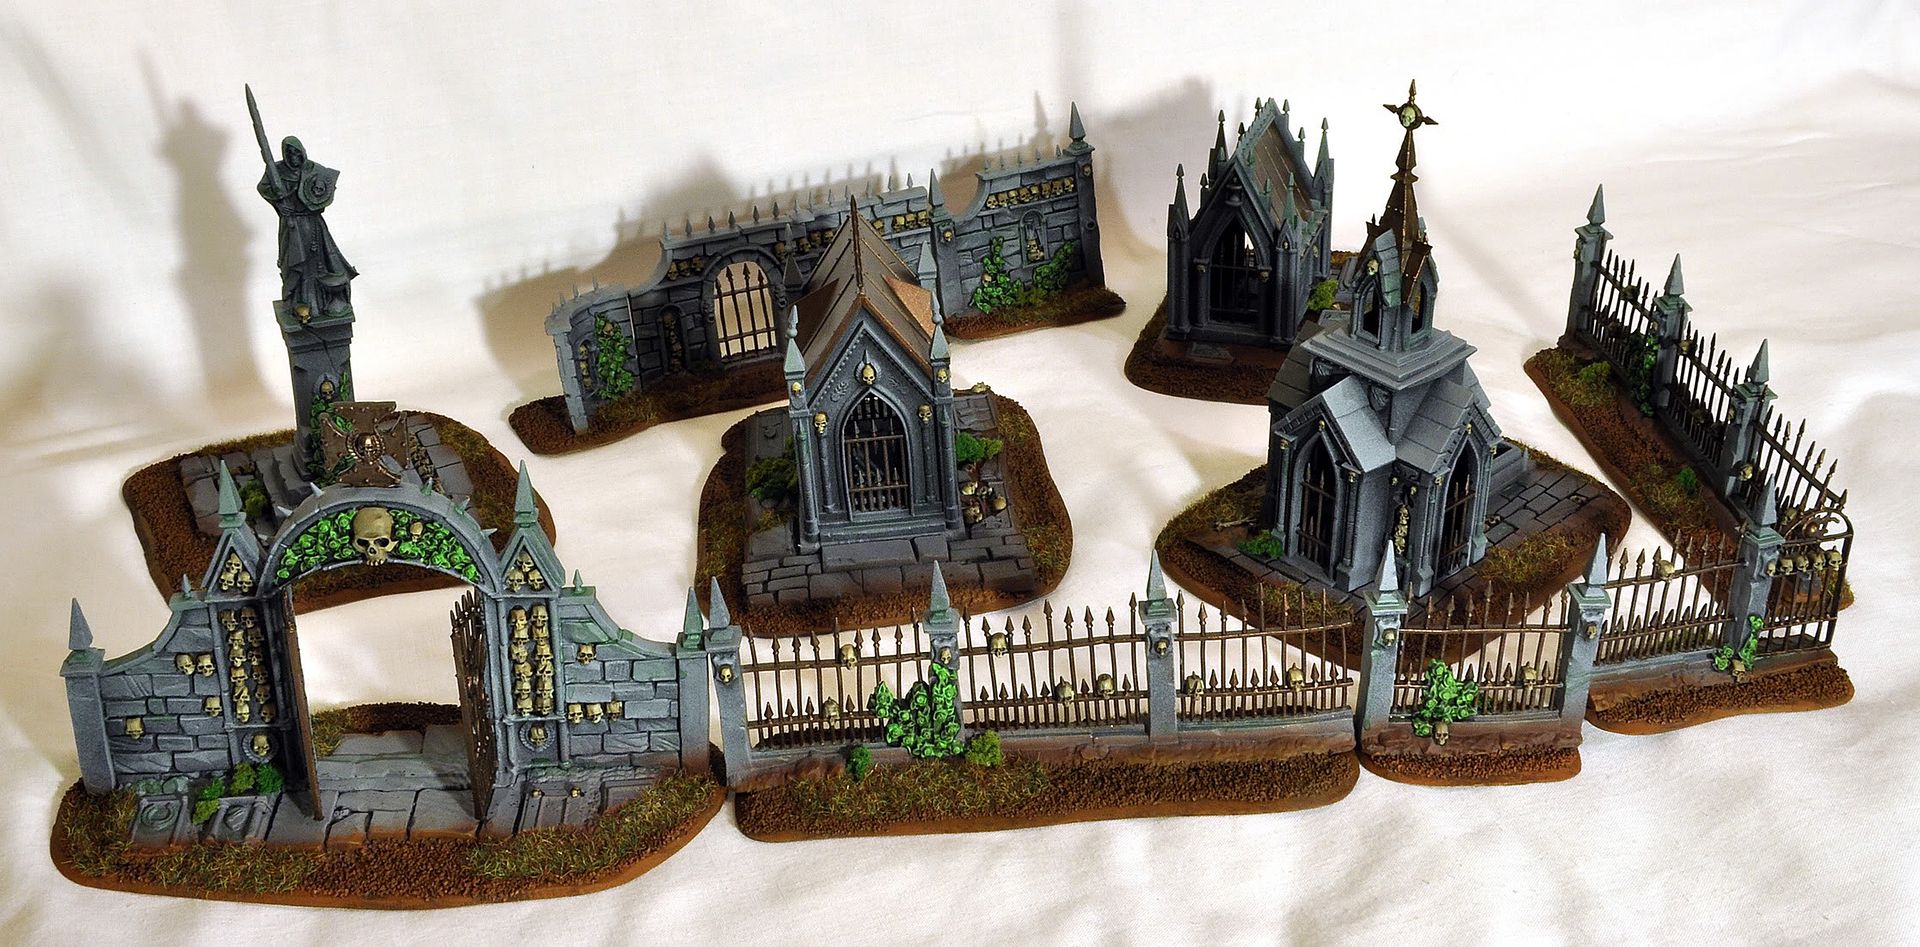
I have been quite busy recently. Being a restless person I have been doing lots of different things. I even managed to finish some of them :D To start off here's some Malifaux stuff. A building and painted Bette Noir.

Byłem ostatnio bardzo zajęty malowaniem wielu projektów naraz. Udało mi się nawet kilka z nich ukończyć :D Na początek budynek do Malifaux i pomalowany model Bette Noir.

Photobucket

Photobucket

Now I present you a unit of 50 Orc Boys. Painted to a 3 Colours Up standard and more. As I hate playing with grey models I prefer to have them like that.

A teraz oddział 50 Orków pomalowanych nieco powyżej standardu turniejowego. Nie cierpię grać szarymi modelami, że wolę ich mieć pomalowanych do tego poziomu.

Photobucket

sobota, 7 stycznia 2012

Garden of Morr

Hey gang!

I have been super busy, when I wasn't busy with something super important, and I managed to finish the Garden of Morr from Games Workshop. Now... I heard people telling me that this kit is amazing. I heard people moaning about the amount of skulls to paint on this thing. Damn! They were all so very, very... right! The amount of skulls was / is daunting. It took me I think 40 minutes to cover them with base coat of Rotting Flesh! God damn! Anyway, let's carry on...

Garden of Morr kit can be assembled in many ways. One of them is you can put it on a base and create a nice graves yard. But that would limit it's playability. It's better to keep all parts separate and be able to have limitless configurations. I will be using it mostly for Malifaux, maybe for WFB, so I want to be able to build a small graveyard and some walls and fences somewhere else. Although I decided to put a bit of hardboard underneath every bit to keep it more stable and make it look better (subjectively speaking).


It was a quick paint job. I tried using airbrush for the bases and some metal parts. Worked out OK, but now I see how I could improve it a bit.


Also... I would like to invite you to Grot Orderly's facebook page: link here

wtorek, 24 maja 2011

Week 21 - Dystopian Wars & Malifaux scenery

This week I have been pretty busy creating some islands for the amazing game that Dystopian Wars is. I decided to have some of my own, even though I do not own a battlegroup yet. If I ever decide to get one, which is more than probable, I will go for the Prussians. The reason behind it is solely esthetically; I just love the look of their ships. Anyways, back to the terrain.
As some of you may know, mostly Dystopian Wars is played in the sea and in the air. Only recently they have released land units, which will change the game slightly if you ever decide to include these units. For now I decided to create some islands of different sizes to occupy the water area of the table.
The other thing I took into consideration is the fact that I do not only play Dystopian Wars. There's 40k and Malifaux for instance, so the terrain should fit those systems too. That's why those islands look like huge islands for DW and small hills for the rest of 28mm systems. I think that's a reasonable compromise.


I also worked on some Malifaux terrain for my Nikodem. This below, is going to be his lair. His funeral house, his collection of coffins and dead people in general. I might build a little room for Sebastian who would be preparing stiffies before they get packed up. Here are early WIPs:


As you can see there is a small coffin, but I think I have to make it better and more horror movie coffin like. It looks too plain.

sobota, 21 maja 2011

Week 20 - Malifaux, 40k, GW News

Malifaux

Painting of my crew goes well. Another three models are finished and ready to play. This week it's three Crooked Men. What I wanted to achieve with them is to have them look really dirty. That's why the skin has deep shadows. But, to keep models nice and bright I tried to pick an element and use bright colours on it.


And my Samurai once again... I like them so much!


Another thing I have done for Malifaux is writing campaign rules. What we want to have in our club is a campaign that will motivate us to play, give us a reason to fight against each other and at the same time keep everything balanced. I will publish these rules over here when they are done, so keep an eye on my website, subscribe, follow, whatever.

Looted Wagon

I had this old Rhino for a while now. I think I got it from my fellow blogger S. from Mighty Miniatures. Anyways, I decided to convert it into something cool for my ork army. So, I added some wheels, built over the wheels thingys. The idea is this vehicle will have a scorcha and contain 10 Burnas. I will be using it to support my assaulting mobs. As the Burnas can't assault from that vehicle, they will be jumping out and covering an enemy with ten flamer templates. I might add two Meks with Kustom Mega Blastas to pop those Termies and Grey Knights. The driver is built, but I haven't included him in the phot as I'm not sure if I want the hatch open or closed, so... that will be the next step.


GW News

So, have you heard? No more metal, just resin. Right... good idea. Resin is cheaper than metal, easier to work with, can have more detail. In current financial climate saving money is a good idea. I wouldn't expect GW to lower the prices, but they have surprised me once again. The prices have risen! So, it will cost them less to make the models, it will cost them less to post them (resin is also lighter than metal) but it will cost us more to buy them! Hold on a minute?! That's just another of those silly ideas to keep their dedicated fans pissed off. How are we supposed to remain in the hobby if the company we used to love so much treats us like that? And if the price difference was minial, but it's not. In some cases it is even 10 - 20%; ridiculous!

Anyway, enough of me ranting. Keep an eye on my website to hear about new podcast episode of All Along the Watchtower and more news on Malifaux campaign rule set and more.

'Till Later!

czwartek, 12 maja 2011

Week 19 - Malifaux and Catan

So, rolling out with the new form of my blog posting here it is; first weekly post. Week 19 fits the role as any other. Well, maybe not as well as week 1 of the year, but I don't want to wait till next year and my time machine usage has ran out recently so there's that.

Hmm, that just popped in my head: If you had a certain usage allowance to use a time machine, how would anyone stop you from using your last 'go' to go back in time when your when you had your initial allowance? Hmm...? Mind bending thoughts! 

Malifaux

Recently I have painted three models for my Malifaux crew. I have painted two Samurai Zombies and The Spirit. The paint jobs I have done on them are rather quick, but I think that they way I have done them (base colour, wash, base colour, highlights) fits the grimy fluff of Malifaux.


My brother just asked (literally just now) if I am going to add some kind of tutorial on how I painted these guys. So here it is.

To paint these Samurai I drybrushed them Scorched Brown on Chaos Black undercoat. Simple thing, I do it with all my Malifaux models to keep them toned down and tied in. Then I applied thin layer of base colour and when that was dry I used Devlan Mud on skin which was based with Camo Green. Later on I repainted the raised areas with Camo Green, on the skin, and after adding some Bleached Bone have done the highlights. Nice and easy.
The Spirit was a bit trickier, as I had to sort of blend the lower stone colour with upper skin tone. To do this I refrained from using blending technique and opted for drybrushing with colour mixing. I started off with foundation Charadon Graphite, then washed the brush and used foundation Tallarn Flesh. then with bits of Tallarn Flesh and started mixing in the Charadon Graphite in it. Later on the skin got washed with Ogryn Flesh and bottom rocky part with Badab Black. Then resurfaced again with base colours and done the highlights.

Catan on XBOX Live

Some people here might now that I love my board games. I play Carcassone, Catan, Space Hulk, Ticket to Ride and many, many others. But there is one problem with board games. They need other human being to participate. That's why I like my iPhone versions of Carcassone and Catan. I can play whenever I want. But what I have found recently is the Catan on XBOX Live. For £6.80 (800pts I believe) which is not much you get the full game. I was a bit worried that it will be sort of a cut down version of the game as it is kinda complex. The thing I was concerned the most was in-game trading. For those who don't know the game, let me run you thorough quickly.

Catan is, what's called, a Euro game; you don't fight your opponent, you fight against the game to beat the rest to the score. You play on a randomly built board made out of hexes. You manage and trade your resources to build settlements, roads, towns and buy development cards. Each of those give you victory points. The person who gets the agreed amount of VPs wins the game. Simple as that.


Now, as you might expect trading resources needed to be done properly to make it work online where you can't speak (well you can but most people don't use voice chat) to your opponent. Luckily the way they solved it is a separate trading screen where you place, accept or refuse the offers. Pretty nifty, works brilliantly!

  • So, was it worth the money? Yes! Sometimes I want to play in the middle of a night with people I don't know. Great!
  • Is it the same game as the board one? Yes! I haven't seen any differences yet. What's even more interesting, you can upgrade your board by downloading different tile sets. Awesome!
OK, guys! I hope you all like the new format. Leave me your feedback below. I always appreciate any comments and the reader  interaction.

'Till next week!

wtorek, 8 lutego 2011

Malifaux painting Punk Zombies

As promised earlier, this is the first of the Punk Zombies finished.


I think with Malifaux models it's best to paint one model at a time. Give it all of your attention and make it individual. That's the case with this model. I didn't even write down what paints I used so next one I paint WILL look different.

wtorek, 1 lutego 2011

Malifaux gaming

Today in the Call of Dice club I had a game of Malifaux, obviously, againsty my mate Soya. We played a game of 37 points. I played with my crew using Nikodem, Mortimer, Flesh Construct, Hanged, 3x Samurai and summoned 4 zombies at most. He used his gang of gremlins with Som'er Teeth Jones and Ophelia (if I'm not mistaken) with lots and lots of other minor gremlins.

He won 6:2 by achieving his Schemes. I scored my points by placing 2 tokens at every quarter and by having more tokens then my opponent has models.

It was my second game of Malifaux and I still have lots to learn. I still have to find those inter-relations between characters and what and when they can do anything of any importance.
What I noticed though is that I need to keep Mortimer close to Nikodem and keep digging! Get those zombies out and about, Bolster Undead and send them forward. Also keep the samurai close by to attack and shield Nicodem from any long range weapons. I will also like to use my Flesh Construct and The Hanged to draw opponents attention.

Any thoughts?

niedziela, 30 stycznia 2011

Mortimer, The Gravedigger and a Zombie

Here you have two finished models. Mortimer and a zombie. With Mortimer I have put some heart into it. With a zombie, not so much. You can probably tell. The model is ok, but it's a very basic tabletop standard. I think he will do...

Photobucket

Photobucket

Photobucket

I should be painting some more zombies and samurai tonight and tomorrow morning. Hopefully I will get them finished before Tuesday's club session.

C&C are welcome...

Flesh Construct by proxy

So here it is, one of the two proxies I'm going to be using this Tuesday!

Photobucket

Any comments and critisim is always welcome!

sobota, 29 stycznia 2011

Malifaux by proxy

Since couple of my mates have 50pts of Malifaux crews I need to bolster my lot. I have two models on order, The Vulture and Canine Remains, but I need some hard hitting stuff. It's going to be a Flesh Construct and The Hanged. I also decided to make one more Zombie and his token form.

When I thought about what to use for my Flesh Construct I thought I could sculpt stuff. And I will, but I need something for this Tuesday, thus a proxy. Looks funny though.

Photobucket

wtorek, 25 stycznia 2011

Malifaux ideas

So I managed to paint all those bugs yesterday. I feel like the weekend didn't go to waste. But now, I need to play some Malifaux, and to do that, I need to paint, buy and sculpt some models. Yes! Sculpt...

I have never done it, so it will be an excitine adventure. What I need to do is this:


I feel like I actually could pull this off. Well, not exactly the same looking model, but something similarly ugly. Since I have never sculpted anything beyond a skull or a bottom of a Space Marine boot I thought of basing the mini on an actual skeleton, same one as I used for those zombies here. Then I could layer green stuff all over it creating muscles and other bits and bobs. I found this tutorial on YouTube and I am watching it tonight in bed. Looks kind of straightforward.


The worst case scenario I will waste some green stuff and end up with a shapeless pulp. No biggie.

sobota, 22 stycznia 2011

Avalanche of projects! - End of day one

Since weekends are the only days I can spend with my wife I didn't do a whole lot. But there is progress on the Genestealers (they are almost finished) and here are the pics of my Malifaux as it is today. Also, a special treat!


Zombies in both forms, a token and a 'living' zombie.


The samurais and the Undertaker. Based with Scorched Brown.


The Genestealers after: base of Adeptus Battlegrey, Scorched Brown and Badab Black on the carapace and Liche Purple on tongues and flesh bits. Also Tin Bitz as base for metal parts and overcoat of Boltgun Metal.

And the special treat from months back! That's who is going to fight them in the claustrophobic corridors of the hulk from space :D


I recently have purchased those Battlefoam trays for Space Hulk from Wayland Games. It's £18 for the set with special bottom trays for all the terrain and such. Funny thing though is the way they can't use the name Space Hulk and have to keep using 'the corridor board game in space' or something similar... hilarious!

I should finish those Genestealers tomorrow, and get on with the samurais, or the zombies. It all depends how much time I have.

'Till Later
Related Posts Plugin for WordPress, Blogger...